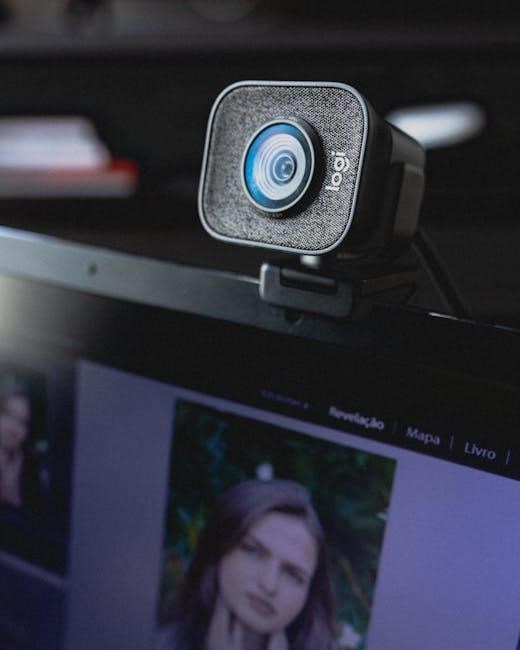
AVerMedia PW313 Webcam: A Comprehensive Guide
This guide details the AVerMedia PW313, a 2-megapixel USB 2.0 webcam, offering setup instructions, software utilization, and troubleshooting steps for optimal performance.
The AVerMedia PW313 Live Streamer CAM 313 is a popular choice for streamers and video conferencing users seeking an affordable yet capable webcam. This guide provides a comprehensive overview, focusing on its 2-megapixel sensor and USB 2.0 connectivity. It’s designed for ease of use, offering a straightforward setup process, particularly with Windows 7 and Windows 10.
Users have reported successful integration with streaming software like OBS, both for streaming and recording purposes. While priced around 1690 Rubles, the PW313 delivers a solid performance for its cost. This manual will walk you through driver installation, initial configuration using CamEngine, and optimization techniques to maximize image and video quality. We’ll also address common issues and explore advanced settings to tailor the webcam to your specific needs.
Key Features and Specifications
The AVerMedia PW313 boasts a 2-megapixel image sensor, delivering clear and detailed video for streaming, video calls, and recording. Its USB 2.0 interface ensures broad compatibility with both older and newer computer systems. The included CamEngine software provides extensive customization options, allowing users to adjust brightness, contrast, and saturation to achieve optimal image quality.
A key feature is its seamless integration with popular streaming platforms like OBS, simplifying the setup process for live broadcasts. The built-in microphone offers convenient audio capture, though external microphones may be preferred for professional-grade sound. Priced competitively around 1690 Rubles, the PW313 offers excellent value. It’s designed for straightforward installation, with downloadable drivers available directly from the manufacturer’s website for Windows operating systems.
Unboxing and Package Contents
Upon opening the AVerMedia PW313 package, you’ll find the webcam itself, securely nestled in protective packaging. Included is a quick installation guide, providing basic setup instructions for immediate use. A driver CD is also present, although downloading the latest drivers from the AVerMedia website is recommended for optimal performance and compatibility, particularly with newer operating systems like Windows 10.
The webcam features a standard USB 2.0 cable, pre-attached for easy connection to your computer. No additional accessories are bundled, focusing on providing the essential components for a hassle-free setup. The packaging is relatively compact, reflecting the webcam’s streamlined design. It’s important to retain the packaging for potential warranty claims or returns. The overall presentation is functional and straightforward, prioritizing product protection and ease of access.
System Requirements and Compatibility
The AVerMedia PW313 boasts broad compatibility, primarily designed for Windows operating systems. Specifically, it supports Windows 7 and Windows 10, ensuring functionality across a range of commonly used platforms. While compatibility with other operating systems isn’t explicitly stated, it may function with limited features or require third-party drivers. A USB 2.0 port is essential for connection; although it may work with USB 3.0 ports, the benefits won’t be realized due to the webcam’s bandwidth limitations.
Minimum system requirements include a processor capable of handling basic video processing and sufficient RAM to support webcam operation alongside other applications. For streaming or recording, a more powerful processor and increased RAM are recommended. The webcam is generally compatible with popular streaming and recording software like OBS Studio, but driver updates are crucial for seamless integration.
Setting Up the AVerMedia PW313
Initial setup involves driver installation and physical connection, followed by configuration within the CamEngine software to personalize settings for optimal webcam performance.
Driver Installation (Windows 7, Windows 10)
To ensure seamless functionality of your AVerMedia PW313 webcam, proper driver installation is crucial. Begin by visiting the official AVerMedia website and navigating to the support section for the PW313 model. Download the appropriate driver package compatible with your operating system – either Windows 7 or Windows 10.
Run the downloaded executable file and follow the on-screen instructions. The installation wizard will guide you through the process, typically involving accepting license agreements and selecting an installation directory. Allow the installation to complete fully; avoid interrupting it.
For Windows 7 users, ensure compatibility mode is not interfering. Windows 10 generally handles driver installation automatically, but a restart may be required after completion. Verify successful installation through Device Manager, checking for any error flags associated with the webcam.
Connecting to Your Computer (USB 2.0)
Establishing a connection between your AVerMedia PW313 webcam and your computer is straightforward. Locate an available USB 2.0 port on your desktop or laptop. While USB 3.0 ports are backward compatible, utilizing a USB 2.0 port ensures optimal performance and avoids potential compatibility issues with the webcam’s specifications.
Gently insert the webcam’s USB connector into the USB 2.0 port. Your operating system should automatically detect the device and initiate the driver installation process if it hasn’t already been completed. A notification will typically appear in the system tray indicating that new hardware has been found and is being configured.
Allow the system to finish configuring the device. Once complete, the webcam will be ready for use in your preferred video conferencing or recording applications. If the webcam isn’t recognized, try a different USB 2.0 port or restart your computer.
Initial Configuration with CamEngine
After successful driver installation, launch the CamEngine software, AVerMedia’s dedicated utility for managing the PW313 webcam. This software provides granular control over various settings, allowing you to customize the video and audio experience. Upon first launch, CamEngine may prompt you to select a preferred language and complete a brief setup wizard.
Within CamEngine, you can adjust key parameters such as brightness, contrast, saturation, and white balance to optimize image quality based on your lighting conditions. Explore the software’s interface to familiarize yourself with the available options. The software also allows for adjustments to the built-in microphone settings, including volume control and noise reduction.
Take time to experiment with these settings to achieve the desired look and sound for your streams or recordings. Save your preferred configurations as presets for quick access in future sessions.
Using the AVerMedia PW313
The AVerMedia PW313 delivers a 2-megapixel image, ideal for streaming and recording. Utilize CamEngine for optimal settings and seamless integration with OBS software.
Image and Video Quality (2 Megapixel)
The AVerMedia PW313 boasts a 2-megapixel sensor, providing reasonably clear image and video quality for everyday use, streaming, and video conferencing. While not competing with higher-resolution webcams, it delivers acceptable visuals in well-lit environments. Expect a noticeable difference in clarity compared to lower-resolution options.
Image sharpness and color accuracy are adequate, though adjustments within the CamEngine software are often necessary to achieve optimal results. Low-light performance is a known limitation; the webcam struggles in dimly lit rooms, resulting in grainy and noisy footage. Proper lighting is crucial for maximizing image quality.
Video recording capabilities are suitable for basic content creation. The webcam supports standard video resolutions, and the frame rate remains stable during recording. However, users seeking professional-grade video quality may find the PW313’s output somewhat lacking. Overall, the 2-megapixel sensor provides a solid foundation for casual users.
Optimizing Settings for Streaming (OBS Integration)
Integrating the AVerMedia PW313 with OBS Studio requires minimal configuration for a smooth streaming experience. First, ensure the webcam is recognized by Windows and properly installed. Within OBS, add a “Video Capture Device” source and select the PW313 from the device list.
To optimize settings, begin by setting the resolution to 1280×720 for a balance between quality and performance. Experiment with the frame rate; 30fps is generally sufficient, but 60fps may be achievable depending on your system’s capabilities. Utilize CamEngine to adjust brightness, contrast, and saturation for optimal visual appeal.
Pay attention to bitrate settings within OBS. A higher bitrate results in better quality but demands more bandwidth. Test different bitrates to find the sweet spot for your internet connection. Consider enabling hardware encoding if your GPU supports it, to reduce CPU load during streaming.
Optimizing Settings for Recording (OBS Integration)
Recording with the AVerMedia PW313 in OBS Studio allows for greater flexibility in resolution and bitrate compared to live streaming. Begin by adding a “Video Capture Device” source and selecting the PW313. For high-quality recordings, consider increasing the resolution to the webcam’s maximum of 1920×1080, if your system can handle it.
Bitrate is crucial for recording quality. A bitrate of 5000-10000 kbps is recommended for 1080p recordings, offering a good balance between file size and visual fidelity. Experiment to find the optimal setting for your storage capacity. Utilize CamEngine to fine-tune brightness, contrast, and saturation before recording.
Enable hardware encoding in OBS to offload processing from your CPU. Choose a suitable recording format, such as MP4, for compatibility and ease of editing. Regularly test recordings to ensure optimal quality and identify any potential issues.

Troubleshooting Common Issues
Addressing typical problems, this section covers driver conflicts, webcam detection failures, and solutions for enhancing suboptimal image quality with the AVerMedia PW313.
Driver Installation Problems
Encountering issues during driver installation is common. First, ensure you’ve downloaded the correct driver version for your operating system (Windows 7 or Windows 10) directly from the AVerMedia website. Temporarily disable any antivirus software, as it can sometimes interfere with the installation process.
If installation fails, try running the installer as an administrator – right-click the executable and select “Run as administrator.” A corrupted download can also cause problems; re-download the driver file. For Windows 7 users, compatibility mode might be necessary – right-click the installer, go to ‘Properties,’ then ‘Compatibility,’ and select a previous Windows version.
Check Device Manager for any error codes related to the webcam. If the device appears with a yellow exclamation mark, right-click and select “Update Driver Software,” then choose the option to browse your computer for driver software and point it to the downloaded driver files. A system restart is often required after driver installation.
Webcam Not Detected
If your AVerMedia PW313 isn’t recognized, begin by verifying the USB connection. Try a different USB 2.0 port on your computer; avoid USB hubs initially, connecting directly to the motherboard. Ensure the cable is securely plugged into both the webcam and the PC. Restart your computer – this often resolves temporary detection issues.
Check Device Manager (search for it in the Windows start menu). Look for the webcam under “Imaging devices” or “Sound, video and game controllers.” If it’s listed with an error, update the driver (as described in the ‘Driver Installation Problems’ section). If it’s not listed at all, try “Scan for hardware changes” in Device Manager.
Confirm the webcam is enabled in your computer’s privacy settings (Settings > Privacy > Camera). Also, test the webcam with different applications (like the Camera app) to isolate whether the issue is application-specific. A faulty USB port could also be the culprit; test with another USB device.
Poor Image Quality
Experiencing subpar image quality with your AVerMedia PW313? First, ensure adequate lighting in your environment. The PW313, being a 2-megapixel webcam, performs best with sufficient illumination. Adjust the brightness, contrast, and saturation settings within the CamEngine software (see ‘Adjusting Brightness, Contrast, and Saturation’).
Clean the webcam lens with a microfiber cloth. Dust or smudges significantly impact clarity. Within CamEngine, experiment with auto-exposure and white balance settings. If using OBS, verify the video settings are configured for 720p or 1080p (though 2MP is best suited for 720p) and the correct framerate.
Check your internet connection if streaming; a weak connection can cause video degradation. Finally, confirm no other applications are heavily utilizing your computer’s resources, as this can affect webcam performance. Ensure the latest drivers are installed.
Advanced Features and Settings
Explore CamEngine’s extensive options, including detailed image adjustments and microphone controls, to personalize your AVerMedia PW313 experience for optimal streaming or recording.
CamEngine Software Overview
CamEngine is AVerMedia’s dedicated software suite for the PW313 webcam, providing a user-friendly interface to control and customize various settings. Upon launching, you’ll find a live preview window displaying your webcam’s feed. The software is logically organized into sections for video adjustments, audio controls, and advanced features.
The primary tab focuses on video settings, allowing adjustments to brightness, contrast, saturation, and white balance. Users can also select different video resolutions, up to the webcam’s maximum 2-megapixel capability. Further options include frame rate control and the ability to apply visual effects or filters. The audio section enables microphone volume adjustment and noise reduction.
CamEngine also offers advanced features like face tracking and gesture control, enhancing interactivity during streaming or video conferencing. A dedicated settings panel allows for software updates and customization of the user interface. The software is essential for unlocking the full potential of the AVerMedia PW313.
Adjusting Brightness, Contrast, and Saturation
Fine-tuning brightness, contrast, and saturation within CamEngine is crucial for achieving optimal image quality with the AVerMedia PW313. Brightness controls the overall lightness or darkness of the image; increasing it illuminates darker scenes, while decreasing it darkens brighter ones. Contrast adjusts the difference between the lightest and darkest areas, enhancing detail and depth. Higher contrast creates a more dramatic look, while lower contrast provides a softer image.
Saturation controls the intensity of colors. Increasing saturation makes colors more vibrant and vivid, while decreasing it desaturates the image, moving towards grayscale. Experimenting with these settings is key, as ideal values depend on your lighting conditions and personal preference.
Start with small adjustments, observing the live preview window for changes. Avoid excessive saturation, which can lead to unnatural-looking colors. Regularly check the image quality in your streaming or recording software to ensure the settings translate well.
Using the Built-in Microphone
The AVerMedia PW313 features an integrated microphone, offering a convenient audio solution for streaming, video conferencing, and recording. While suitable for basic communication, its quality is generally lower than a dedicated microphone. To activate the microphone, ensure it’s selected as the default audio input device in your operating system’s sound settings and within your chosen application (OBS, Zoom, etc.).
CamEngine allows for basic microphone volume adjustments. However, for superior audio quality, consider utilizing noise suppression and gain control features within your streaming or recording software. Reducing background noise and optimizing gain levels will significantly improve clarity.
Be mindful of the microphone’s proximity to your mouth; excessive distance can result in a quiet signal, while being too close may cause distortion. Experiment to find the optimal placement for clear and balanced audio.
Comparison with Similar Webcams
Compared to other 2MP webcams, the PW313 offers a competitive feature set and image quality, particularly considering its approximate 1690 Ruble price point and value.
PW313 vs. Other 2MP Webcams
The AVerMedia PW313 distinguishes itself within the crowded 2MP webcam market through a combination of software integration and affordability. While numerous competitors offer similar resolutions and USB 2.0 connectivity, the inclusion of CamEngine software provides a significant advantage for users seeking granular control over image settings. Many alternative webcams rely on basic operating system drivers, lacking dedicated tools for brightness, contrast, and saturation adjustments.
Furthermore, the PW313’s compatibility with streaming and recording software like OBS Studio is well-documented, simplifying setup for content creators. Some competing models may require additional configuration or exhibit compatibility issues. Considering its approximate price of 1690 Rubles, the PW313 presents a compelling value proposition, delivering a feature-rich experience without a premium price tag. However, users prioritizing advanced features like autofocus or wider field of view may need to explore higher-tier options.
Price Point and Value
The AVerMedia PW313 webcam occupies an attractive position in the market, particularly regarding its value for money. Currently priced around 1690 Rubles, it presents a budget-friendly option for users seeking a reliable 2-megapixel webcam. This price point makes it accessible to a wide range of consumers, including students, remote workers, and casual streamers.
Compared to webcams with similar specifications, the PW313 offers a competitive feature set, especially when considering the included CamEngine software. This software enhances the user experience by providing customizable settings for image quality and microphone control. While higher-end webcams boast superior features like autofocus and higher resolutions, the PW313 delivers a solid performance for its price, making it an excellent choice for those prioritizing affordability without sacrificing essential functionality.
Where to Buy and Current Pricing (Approx. 1690 Rubles)
Finding the AVerMedia PW313 webcam is achievable through various online retailers and potentially select brick-and-mortar electronics stores. Availability may vary depending on your geographical location. Popular online marketplaces like Amazon, eBay, and AliExpress frequently list the PW313, offering competitive pricing and shipping options. Additionally, checking the official AVerMedia website or authorized resellers in your region is recommended.
As of today, February 5th, 2026, the approximate retail price for the AVerMedia PW313 is around 1690 Rubles. However, prices can fluctuate based on vendor promotions, stock levels, and currency exchange rates. It’s advisable to compare prices across multiple platforms to secure the best possible deal. Remember to factor in shipping costs when evaluating the overall price.
Resources and Support
For comprehensive assistance with your AVerMedia PW313 webcam, several resources are readily available. The official AVerMedia website ([https://www.avermedia.com/](https://www.avermedia.com/)) provides a dedicated support section, including frequently asked questions (FAQs), troubleshooting guides, and downloadable drivers. Users encountering driver installation problems can find assistance and the latest software versions on the support page.
Furthermore, the AVerMedia community forum offers a platform for users to share experiences, ask questions, and receive peer-to-peer support. Online tutorials and setup guides, like those detailing CamEngine configuration, are also accessible through various tech blogs and video platforms. Should you require direct assistance, AVerMedia’s customer support team can be contacted via email or phone, offering personalized solutions to your specific issues.