Article Plan: Biceps Tear Exercises PDF
This PDF details a comprehensive rehabilitation protocol following biceps tendon repair, emphasizing phases of immobilization, range of motion, strengthening, and functional return.
Biceps tears, impacting both proximal and distal tendons, are common injuries often requiring surgical intervention, followed by a structured rehabilitation program. This guide focuses on post-operative recovery, emphasizing physiotherapy and coach guidance from day one. Successful healing necessitates a phased approach, protecting the repaired tissue while progressively restoring range of motion and strength.
Understanding the specific tear location – proximal (near the shoulder) or distal (near the elbow) – is crucial, as rehabilitation protocols differ. Reconstruction techniques, like resuspension, aim to restore biceps function. This PDF provides detailed exercises for each phase, ensuring a safe and effective return to full activity. Ignoring proper rehabilitation can lead to complications and diminished outcomes.
Understanding Biceps Tear Types
Biceps tears are categorized primarily as proximal or distal, each demanding a tailored rehabilitation approach. Proximal biceps tears involve the long head of the biceps tendon at the shoulder, often addressed with tenodesis or tenotomy. Distal biceps tears, occurring at the elbow, frequently require reconstruction to restore elbow flexion and forearm supination strength.
The rehabilitation protocol outlined in this PDF considers these distinctions. Distal tears, often reconstructed by re-attaching the tendon to the radius, necessitate a focus on protected elbow range of motion. Understanding the specific surgical technique – resuspension or reconstruction – guides exercise selection and progression, optimizing recovery outcomes.
2.1 Proximal Biceps Tear
Proximal biceps tears often involve the long head of the biceps tendon at its origin in the shoulder. Rehabilitation following tenodesis or tenotomy focuses on restoring shoulder function, rather than biceps strength directly. Early phases prioritize gentle range of motion exercises, avoiding excessive stress on the repair site.
The PDF’s protocol emphasizes controlled shoulder movements and scapular stabilization. Strengthening exercises gradually introduce resistance, targeting surrounding rotator cuff muscles. The goal is to compensate for any lost biceps function and achieve pain-free shoulder movement, enabling a return to daily activities without compromising the repaired tissues.

2.2 Distal Biceps Tear
Distal biceps tears, occurring at the elbow, typically require surgical reconstruction to restore elbow flexion and forearm supination strength. The PDF’s rehabilitation program for these tears is meticulously phased. Initial immobilization in a locked brace is crucial, followed by gentle range of motion exercises for the wrist and shoulder to prevent stiffness.
Progressive strengthening begins with active elbow extension, gradually increasing to bicep curls with light resistance. The protocol details specific exercises to rebuild forearm pronation/supination, essential for functional recovery. Careful monitoring and adherence to the phased approach are vital to prevent re-rupture.

Post-Surgery Rehabilitation Phases
Following biceps tendon repair, a structured rehabilitation program is paramount for optimal recovery. This PDF outlines a four-phase protocol designed to protect the repaired tissue while progressively restoring range of motion and strength. Phase I focuses on immobilization and gentle exercises. Phase II introduces active extension and light strengthening.
Phase III emphasizes progressive strengthening with increasing resistance, and finally, Phase IV aims for a full return to function. Throughout all phases, physiotherapy and coach guidance are essential for proper technique and progression, minimizing complications and maximizing functional outcomes.
3.1 Phase I: Immobilization & Early Range of Motion (0-3 Weeks)
The initial phase (0-3 weeks) prioritizes protecting the repaired biceps tendon through strict immobilization, typically utilizing a locked-in-neutral immobilizer worn consistently. While immobilized, gentle range of motion (ROM) exercises for the wrist and shoulder are initiated to prevent stiffness. These movements are performed cautiously within pain-free limits.
The goal is to maintain some joint mobility without stressing the repair. Therapeutic exercises are introduced gradually, focusing on minimizing swelling and initiating a gentle restoration of movement. Adherence to immobilization and careful execution of ROM exercises are crucial during this early stage.
Range of Motion Exercises ⸺ Phase I
Phase I ROM exercises are foundational for preventing stiffness post-biceps repair. Gentle Wrist ROM involves slow, controlled flexion, extension, radial deviation, and ulnar deviation, performed multiple times daily within a pain-free arc. Similarly, Gentle Shoulder ROM focuses on pendulum exercises, passive forward elevation, and gentle external rotation, avoiding abduction beyond 30 degrees.
These exercises are performed cautiously, respecting tissue healing. The emphasis is on small, controlled movements to stimulate circulation and maintain joint mobility without compromising the surgical repair. Consistent, pain-free execution is key to successful early rehabilitation.
4.1 Gentle Wrist ROM
Gentle Wrist Range of Motion (ROM) exercises are initiated immediately post-surgery, within the confines of the immobilizer. These movements aim to maintain wrist flexibility and prevent stiffness without stressing the biceps repair. Perform slow, controlled flexion – bending the wrist downwards – and extension – bending it upwards.
Additionally, incorporate radial deviation – moving the wrist towards the thumb – and ulnar deviation – moving it towards the little finger. Execute these motions gently, focusing on a pain-free range. Repeat each movement multiple times throughout the day, as tolerated, prioritizing controlled, small arcs of motion.
4.2 Gentle Shoulder ROM
Gentle Shoulder Range of Motion (ROM) exercises are crucial in Phase I, performed while the arm remains immobilized. Pendulum exercises are particularly beneficial; lean forward, allowing the arm to hang freely and gently swing it in small circles – clockwise and counterclockwise.
Additionally, perform gentle shoulder flexion – raising the arm forward – and abduction – moving it away from the body, within a pain-free range. These movements prevent shoulder stiffness and maintain circulation. Focus on passive range of motion, letting gravity assist, and avoid any active muscle contraction that could compromise the biceps repair.
Phase II: Active Extension & Strengthening (Weeks 3-6)
Phase II focuses on regaining active elbow extension and initiating gentle strengthening. The primary goal is to restore the ability to straighten the arm towards 30 degrees of extension. Active-assisted range of motion exercises, utilizing the uninjured arm or a towel, are encouraged.
Isometric exercises, involving muscle contraction without joint movement, are introduced to begin strengthening the biceps and surrounding muscles. These should be performed pain-free and with controlled movements. Avoid any resisted flexion during this phase to protect the healing tendon. Consistent, low-intensity exercises are key to progressive recovery.
Exercises for Phase II
The cornerstone of Phase II is active elbow extension to 30 degrees, performed multiple times daily. This exercise gently encourages regaining lost range of motion. Isometric biceps contractions, holding the contraction for 5-10 seconds, are initiated without movement.
Wrist range of motion exercises continue, focusing on both flexion and extension. Gentle forearm pronation and supination, keeping the elbow bent, are also incorporated. These exercises aim to prevent stiffness and maintain circulation. Remember to stop immediately if any pain arises, and prioritize controlled, pain-free movements throughout this phase.
6.1 Active Elbow Extension to 30 Degrees
This exercise is crucial for restoring elbow extension following biceps repair. Begin with the elbow bent at 90 degrees, supporting the forearm. Slowly and actively straighten the elbow as much as comfortably possible, aiming for 30 degrees of extension.
Focus on controlled movement, avoiding any jerking or forcing. Repeat this motion 10-15 times, several times a day, as prescribed by your physiotherapist. Monitor for any increase in pain; if experienced, reduce the range of motion. This exercise prepares the elbow for more advanced strengthening activities in subsequent phases.
Phase III: Progressive Strengthening (Weeks 6-12)
Phase III focuses on gradually increasing muscle strength around the elbow and shoulder. Exercises are progressed based on individual tolerance and pain levels. Light resistance is introduced, carefully monitoring for any signs of re-injury.
The goal is to rebuild strength without compromising the repaired tendon. This phase incorporates bicep curls with minimal weight and forearm pronation/supination exercises. Consistent adherence to the prescribed program, guided by a physiotherapist, is vital for optimal recovery and functional improvement. Avoid overexertion and prioritize proper form.
Strengthening Exercises ⸺ Phase III
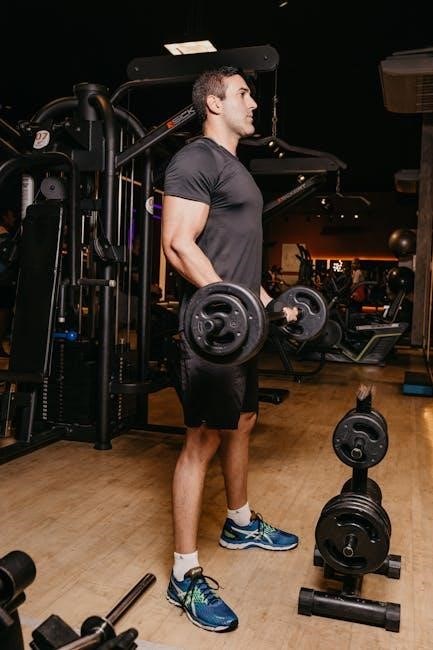
This phase introduces controlled resistance to rebuild strength. 8.1 Bicep Curls (Light Resistance): Perform slow, controlled curls, starting with very light weights (1-2 lbs), focusing on proper form. Gradually increase weight as tolerated. 8.2 Forearm Pronation/Supination: Using a light dumbbell, slowly rotate your forearm palm up (supination) and palm down (pronation).
These exercises enhance biceps and forearm muscle strength. Maintain a pain-free range of motion. Perform 3 sets of 10-15 repetitions for each exercise, 2-3 times per week. Consistent execution, guided by a physical therapist, is crucial for optimal recovery.
8.1 Bicep Curls (Light Resistance)
Begin with extremely light dumbbells (1-2 lbs) or resistance bands. Focus on slow, controlled movements, avoiding any jerking or momentum. Keep your elbow close to your body throughout the exercise. Perform a full range of motion, from full extension to a comfortable flexion, without pain.
Complete 3 sets of 10-15 repetitions, resting briefly between sets. This exercise targets the biceps brachii, promoting muscle strengthening. Monitor for any discomfort; stop immediately if pain arises. Proper form is paramount to prevent re-injury and ensure effective rehabilitation.
8.2 Forearm Pronation/Supination
Hold a light dumbbell (1-3 lbs) in your hand, keeping your elbow bent at 90 degrees and close to your side. Slowly rotate your forearm so your palm faces up (supination), then rotate it so your palm faces down (pronation). Maintain a controlled pace throughout the movement, avoiding any quick or jerky motions.
Perform 3 sets of 10-15 repetitions. This exercise strengthens the forearm muscles, which assist in biceps function and overall arm stability. Pay attention to any pain signals and adjust the weight accordingly. Proper execution is crucial for safe and effective recovery.
Phase IV: Return to Function (Weeks 12+)
This phase focuses on regaining full arm functionality and preparing for daily activities and, potentially, sport-specific movements. Continue strengthening exercises from Phase III, gradually increasing resistance and incorporating functional movements. Activities like lifting, carrying, and reaching should be reintroduced cautiously.
Emphasis is placed on proprioception – your body’s awareness of its position in space – to improve coordination and prevent re-injury. Monitor for any pain or swelling, adjusting activity levels as needed. A successful return to function requires consistent effort and adherence to your physiotherapist’s guidance.
Advanced Exercises ⸺ Phase IV
Progress to more challenging exercises, building upon the foundation established in previous phases; Hammer curls target the brachialis and brachioradialis, assisting biceps function. Concentration curls isolate the biceps for focused strengthening. Incorporate exercises mimicking real-life activities, such as lifting boxes or reaching overhead.
Plyometric exercises, like medicine ball throws, can improve power and explosiveness, if appropriate. Remember to maintain proper form throughout all exercises to avoid strain. Continue monitoring for pain and adjust the intensity accordingly. This phase aims to restore full strength and function, preparing you for a return to your desired activity level.
10.1 Hammer Curls
Hammer curls are performed with palms facing each other throughout the movement, resembling holding a hammer. This variation emphasizes the brachialis and brachioradialis muscles, providing supplementary support to the biceps. Begin with light dumbbells, focusing on controlled movements. Perform 3 sets of 10-12 repetitions.
Maintain a stable core and avoid swinging your body to lift the weight. Gradually increase the weight as strength improves. This exercise is beneficial for developing overall arm strength and improving functional capacity. Proper form is crucial to prevent re-injury and maximize effectiveness.
10.2 Concentration Curls
Concentration curls isolate the biceps muscle by stabilizing the upper arm against the inner thigh. This minimizes momentum and maximizes muscle activation. Sit on a bench with legs spread, and rest the back of your upper arm against your inner thigh. Use a light dumbbell and perform slow, controlled curls.
Complete 3 sets of 10-12 repetitions, focusing on a full range of motion. Avoid swinging or using momentum. This exercise is excellent for building peak biceps strength and definition. Maintaining proper posture is vital for preventing strain and ensuring effective muscle engagement.

Stretching Exercises for Biceps Recovery
Regular stretching is crucial for restoring flexibility and preventing stiffness after a biceps tear repair. Begin with cross-body arm stretches, gently pulling your arm across your chest to feel a stretch in the biceps. Hold for 20-30 seconds, repeating 2-3 times.
Next, perform elbow extension stretches, keeping your elbow straight and gently pulling your hand back. Also, incorporate wrist flexor and extensor stretches to improve overall arm mobility. Always stretch to the point of mild tension, never pain. Consistent stretching promotes healing and improves functional range of motion.
Importance of Physiotherapy & Coach Guidance
Physiotherapy and coach supervision are paramount throughout the biceps tear recovery process, starting immediately post-surgery. A qualified professional designs a tailored rehabilitation program, ensuring correct form and progression. They monitor healing, address complications, and optimize functional recovery.
Strict adherence to the protocol, guided by expert feedback, minimizes re-injury risk. A coach provides motivation and ensures exercises are performed safely and effectively. Regular assessments track progress and adjust the program accordingly, maximizing the potential for a full return to activity.
Reconstruction Techniques (Resuspension)
Surgical reconstruction, specifically resuspension techniques, addresses significant biceps tendon ruptures. This involves re-attaching the tendon to the radius (distal) or humerus (proximal) using anchors. Techniques include isolating the long head of the biceps and securing it within a defect zone.
Resuspension aims to restore biceps function and strength. The choice of technique depends on the tear location and patient factors. Post-operative rehabilitation is crucial for successful outcomes, following a phased approach to protect the repair and regain range of motion and strength.
13.1 Distal Biceps Tendon Reconstruction
Distal biceps tendon reconstruction focuses on re-attaching the torn tendon at its insertion point on the radius bone. This is often necessary after a complete rupture, particularly for individuals desiring full elbow flexion and forearm supination strength. Surgeons utilize various fixation methods, including interference screws and suture anchors, to securely reattach the tendon.
Post-operative protocols emphasize initial immobilization followed by a carefully progressed rehabilitation program. Early challenges often involve regaining elbow flexion and addressing discomfort. Successful reconstruction relies heavily on adherence to physiotherapy and a structured exercise regimen;
Considerations for Distal Biceps Rupture Rehab
Rehabilitation after distal biceps rupture requires a nuanced approach, acknowledging individual factors like activity level and surgical technique. Early immobilization is crucial, typically with a splint locked in neutral. Pain management is paramount, allowing for gradual range of motion exercises.
Progressing exercises must be carefully monitored to avoid re-rupture. Strengthening should begin with isometric contractions, progressing to light resistance curls and forearm pronation/supination. Patient compliance and consistent physiotherapy are vital for optimal outcomes, often extending beyond 12 weeks for full functional recovery.
3D Anatomy & Clinical Features
Understanding the anatomy of the biceps tendon is fundamental to successful rehabilitation. The distal biceps tendon inserts onto the radius, crucial for elbow flexion and forearm supination. A rupture typically presents with a palpable defect and “Popeye” deformity.

Clinical assessment involves evaluating range of motion, strength, and pain levels. 3D anatomical models aid in visualizing the injury and explaining the repair process to patients. Accurate diagnosis and understanding the biomechanics are essential for tailoring a specific exercise program, optimizing recovery and preventing complications.
Patient Case Study: Week 14 Post-Op
This case study follows “Ross,” 14 weeks post-distal biceps tendon repair to the radius. He’s progressed well through rehabilitation, demonstrating significant improvements in elbow flexion and forearm supination strength.
His program included a phased approach, starting with immobilization and gentle range of motion, progressing to strengthening exercises like bicep curls and forearm pronation/supination. At week 14, Ross exhibits near-full functional recovery, highlighting the effectiveness of a structured rehabilitation protocol and dedicated patient compliance. Continued monitoring and exercise adherence are crucial for long-term success.
Potential Complications & Precautions
Post-operative biceps repair carries potential risks, including re-rupture of the tendon, especially with early aggressive loading. Stiffness in the elbow joint is another concern, necessitating diligent range of motion exercises.
Neurological complications, though rare, can occur, manifesting as numbness or tingling. Adherence to the rehabilitation protocol is paramount to minimize these risks. Patients should immediately report any increasing pain, swelling, or signs of infection. Careful monitoring by a physiotherapist and surgeon is essential throughout the recovery process to ensure optimal healing and prevent complications.

Resources & PDF Download Information
A downloadable PDF containing this comprehensive biceps tear rehabilitation protocol, including detailed exercise illustrations and timelines, will be available soon at [website address ― placeholder]. This resource is intended to supplement, not replace, guidance from your qualified physiotherapist and surgeon.
Additional resources include articles on proximal and distal biceps tendon repair from reputable medical websites like [website address ― placeholder] and [website address ― placeholder]. Remember, individualized rehabilitation is crucial; this PDF provides a general framework. Consult your healthcare team for a personalized plan tailored to your specific needs and recovery progress.