
Manual Trainer MTB: A Comprehensive Guide
This guide explores manual trainers, aiding skill development for jumps, drops, and berms in a safe, accessible environment, fostering confidence and flow for riders.
What is a Manual Trainer MTB?
A Manual Trainer MTB is a specialized training tool designed to help mountain bikers master the crucial skill of manualing – lifting and balancing the front wheel without pedaling. Unlike pump tracks focused on broader cycling skills, these trainers isolate and refine this specific technique. They provide a controlled environment, allowing riders to practice repeatedly without the commitment of speed or complex terrain.
Essentially, it’s a low-to-the-ground structure, often resembling a short, angled ramp or a series of rollers. This allows riders to focus solely on body positioning, weight shifting, and balance – the core components of a successful manual. They are valuable for assessing rider ability and building a foundation for more advanced skills, offering a safe space near amenities.
The Benefits of Using a Manual Trainer
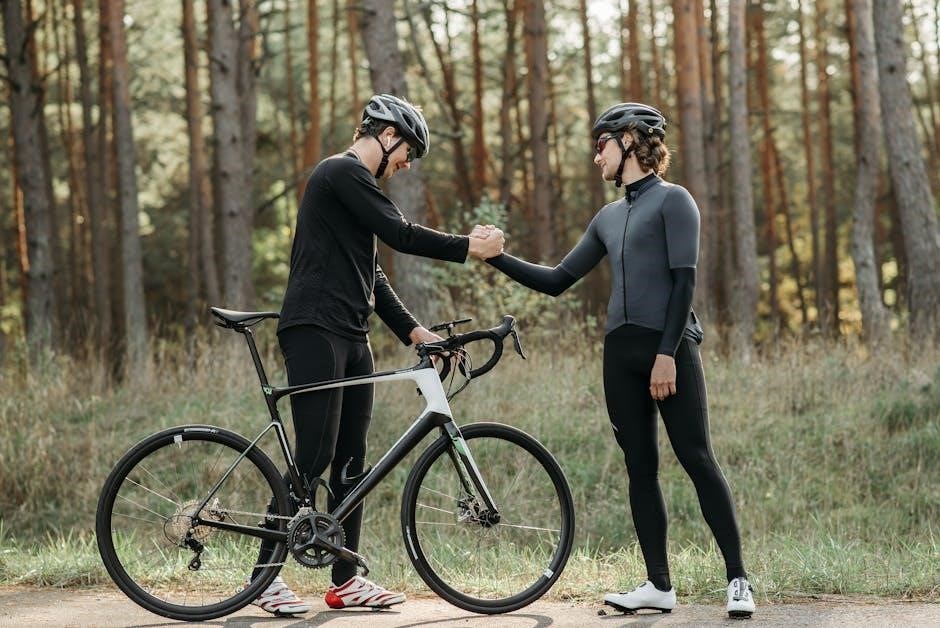
Manual trainers offer a focused approach to skill development, significantly improving a rider’s control and confidence. They allow for repetitive practice of the manual technique, accelerating learning and muscle memory development. This controlled environment minimizes risk compared to practicing on trails, making it ideal for beginners or those refining their technique.
Beyond the manual itself, trainers enhance balance, body positioning, and weight transfer – skills transferable to jumps, berms, and overall trail riding. They foster a social learning environment, similar to pump tracks, encouraging progression and building a strong foundation. Ultimately, consistent use builds flow and prepares riders for more challenging terrain, boosting overall riding enjoyment.
Understanding the Core Skills Developed
A manual trainer fundamentally develops balance and coordination, demanding precise weight shifting and body positioning. Riders learn to control the bike’s pitch without relying on pedal power, fostering independent bike handling skills. This process strengthens core muscles crucial for maintaining stability and absorbing trail impacts.
Furthermore, the trainer cultivates a heightened sense of timing and anticipation, essential for linking maneuvers like manuals to jumps or navigating corners. It encourages riders to assess their ability and refine technique through repetition. Mastering these core skills translates directly to improved confidence and control on varied terrain, enhancing the overall riding experience.
Types of Manual Trainers Available
Manual trainers come in static and rolling forms, with options for fixed or adjustable setups, catering to diverse skill levels and training preferences.
Static Manual Trainers
Static manual trainers represent the foundational approach to learning this crucial mountain biking skill. These trainers typically consist of a stable, non-moving platform designed to mimic the balance point required for a manual. They are excellent for beginners as they eliminate the variable of forward motion, allowing riders to focus solely on weight distribution and body positioning.
The simplicity of a static trainer makes it incredibly accessible and affordable. Riders can practice repeatedly without the need to pedal or steer, building muscle memory and developing the core strength necessary for successful manuals. While they don’t fully replicate the feel of a rolling manual, they provide a safe and controlled environment to establish the fundamental techniques. They are often constructed from wood or metal, offering durability and stability for consistent practice sessions.
Rolling Manual Trainers
Rolling manual trainers introduce the element of momentum, bridging the gap between static practice and real-world riding. These devices feature wheels or a rolling base, allowing riders to practice manuals while in motion, simulating the feeling of maintaining balance during a trail ride. This dynamic aspect is crucial for developing the timing and coordination needed for successful manuals on varied terrain.
Unlike static trainers, rolling models require riders to actively pedal and steer, enhancing their overall bike control skills. They often incorporate adjustable resistance levels, allowing for progressive training as skills improve. The added challenge of maintaining speed and balance makes rolling trainers ideal for intermediate and advanced riders looking to refine their technique and build confidence before attempting manuals on trails.
Adjustable vs. Fixed Trainers
The choice between adjustable and fixed manual trainers hinges on rider skill level and training goals. Fixed trainers offer a consistent, unchanging platform, ideal for beginners focusing on foundational body positioning and balance. They eliminate variables, allowing riders to concentrate solely on the manual technique without worrying about speed or resistance.
Adjustable trainers, conversely, provide versatility. Riders can modify height, angle, or resistance to simulate different trail conditions and progressively challenge themselves. This adaptability is beneficial for intermediate to advanced riders seeking to refine their skills and prepare for more complex maneuvers. Adjustable models often mimic real-world terrain better, fostering a more transferable skillset.

Setting Up Your Manual Trainer
Proper setup is crucial for safety and effective training. Choose a level location, carefully assemble the trainer, and always perform thorough safety checks beforehand;
Choosing the Right Location
Selecting an appropriate location is paramount for a safe and productive manual trainer experience. Prioritize a flat, stable surface – concrete or smooth asphalt are ideal. Avoid areas with loose gravel, dirt, or uneven pavement, as these can compromise stability and increase the risk of falls.
Ensure ample surrounding space, free from obstacles like trees, walls, or parked vehicles. This allows for sufficient run-up and bailout room if needed. Consider proximity to amenities; being near a shelter or water source can enhance comfort during longer sessions.
Indoor spaces, like garages or gyms, offer weather protection but require adequate ventilation. Outdoor locations benefit from natural light and fresh air, but be mindful of sun exposure and potential weather changes. Ultimately, the best location is one that minimizes hazards and maximizes your ability to focus on skill development.
Assembly and Initial Adjustments
Careful assembly and initial adjustments are crucial for a functional and safe manual trainer. Begin by thoroughly reviewing the manufacturer’s instructions, ensuring all components are present and accounted for. Assemble the trainer on a level surface, tightening all bolts and fasteners securely – double-checking is vital!
Most trainers feature adjustable height or angle settings. Start with a moderate setting, suitable for beginners, and gradually increase the difficulty as your skills progress.
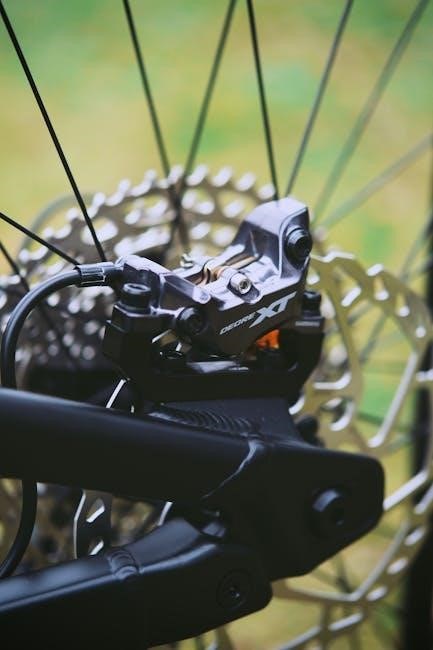
Pay close attention to wheel alignment; ensure your bike’s front wheel sits squarely within the trainer’s cradle. A misaligned wheel can lead to instability. Finally, meticulously verify that the front wheel is correctly and securely installed before each ride – this is non-negotiable for safety.
Safety Checks Before Each Use
Prioritizing safety is paramount when utilizing a manual trainer. Before every session, conduct a comprehensive inspection. Firmly verify the trainer’s stability on the riding surface, ensuring it remains level and doesn’t wobble. Critically examine the front wheel’s secure placement within the trainer – a loose wheel is a significant hazard.
Inspect all bolts and fasteners, retightening if necessary. Confirm the surrounding area is clear of obstacles, providing ample space for maneuvering.
Always wear appropriate protective gear, including a helmet. Remember, consistent pre-ride checks are not merely recommended; they are essential for preventing accidents and maximizing your training experience. Never compromise on safety!

Mastering the Manual Technique
Effective manuals rely on precise body positioning, weight shifting, and balance control, progressively building skills through focused drills on the trainer itself.
Body Positioning for Success
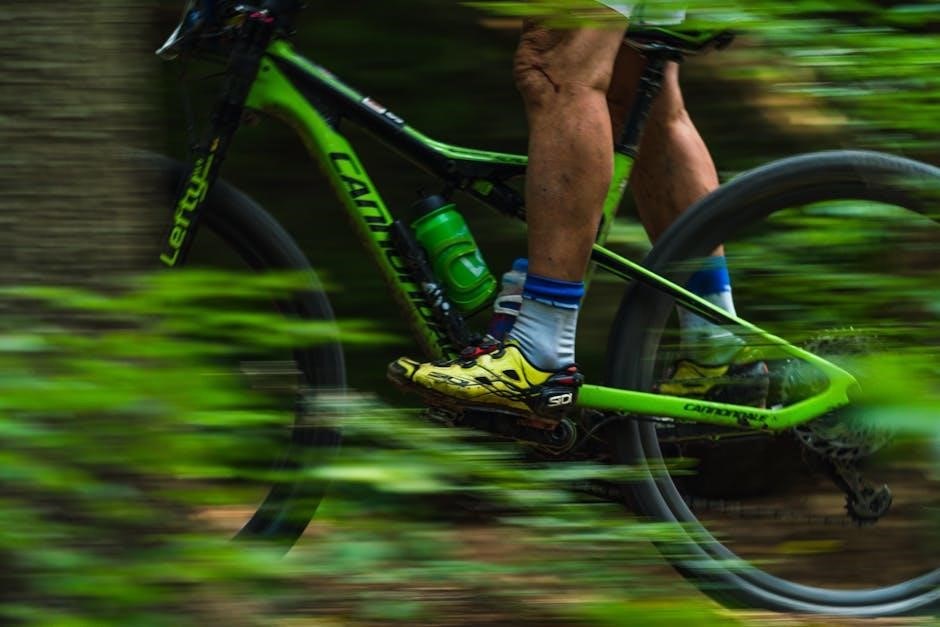
Achieving a successful manual begins with proper body positioning. Maintain a relaxed, athletic stance, with knees and elbows bent, acting as suspension. Your weight should be centered over the bottom bracket, avoiding leaning too far forward or backward initially.
Keep your back flat and core engaged for stability. Look ahead, not down at the front wheel – vision dictates direction. Arms should be wide, providing a stable platform.
As you initiate the manual, subtly shift your weight backward while simultaneously lifting the front wheel. Avoid abrupt movements; smoothness is key. Experiment with slight adjustments to find your balance point, understanding how small shifts in weight impact the bike’s attitude. Consistent practice reinforces muscle memory and improves control.
Weight Shifting and Balance
Mastering weight shifting is crucial for manual control. Subtle movements are more effective than large, jerky ones. Initiate the manual by gently pushing your hips backward while simultaneously extending your arms. This shifts your center of gravity, lifting the front wheel.
Balance is maintained by micro-adjustments – using your arms, core, and legs to counteract forward or backward momentum. If you feel yourself falling back, tap the rear brake lightly.
To prevent looping out, keep your weight centered and avoid excessive leaning. Practice finding the “sweet spot” where the bike balances effortlessly. Consistent repetition builds proprioception, enhancing your ability to feel and respond to changes in balance.
Progressive Training Drills
Begin with static balance drills, practicing holding the manual position for increasing durations. Focus on maintaining a stable core and relaxed upper body. Next, incorporate small weight shifts, gently rocking back and forth to find your balance point.
Progress to rolling manuals, starting with very slow speeds. Gradually increase speed as your confidence grows. Introduce controlled braking taps to prevent looping out and refine balance control.
Cone drills can enhance precision and steering control during manuals. Finally, practice linking multiple manuals together, focusing on smooth transitions and consistent form. Remember consistent practice is key!

Integrating the Manual Trainer with Other Skills
Mastering the manual unlocks advanced techniques, seamlessly linking it to jumps, berms, and corners, ultimately building flow and boosting overall riding confidence.
Linking Manuals to Jumps
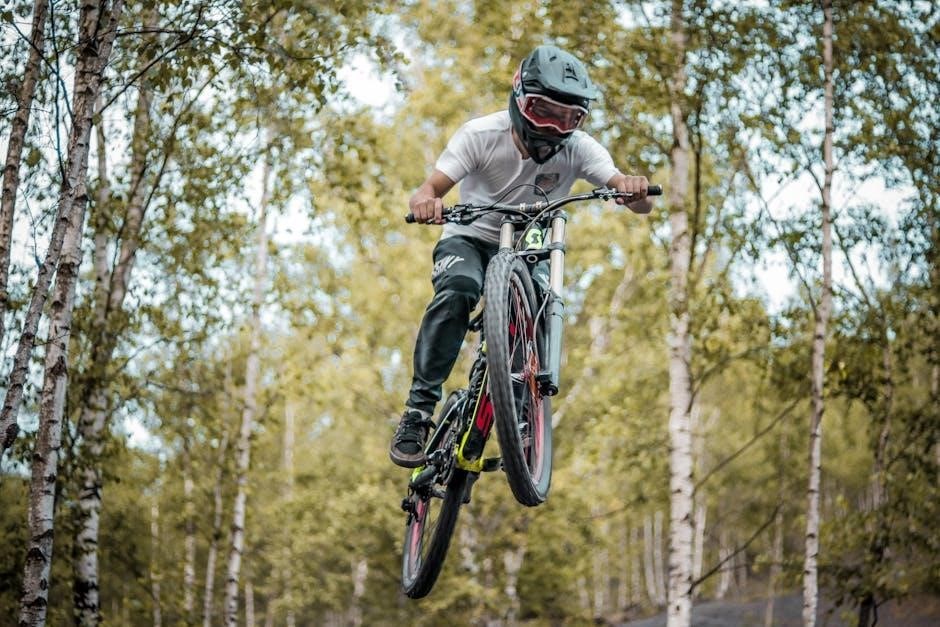
Transitioning from a manual directly into a jump requires precise timing and body control. The manual trainer provides a safe space to repeatedly practice this crucial skill; Begin by perfecting a stable manual, then gradually increase the speed as you approach a small jump or ramp.
Focus on maintaining balance during the manual and smoothly initiating the jump by extending your arms and legs. Avoid abruptly ending the manual; instead, let it flow into the jump motion. Consistent practice on the trainer builds muscle memory, allowing for a more natural and controlled transition.
Visualize the jump and maintain a focused gaze. Remember to absorb the landing with bent arms and legs, maintaining a centered position. The trainer helps refine this technique without the added risk of outdoor terrain.
Manuals into Berms and Corners
Successfully linking a manual into a berm or corner demands a shift in weight and a dynamic body position. The manual trainer allows riders to safely explore these transitions repeatedly. Initiate the manual, then subtly shift your weight towards the inside of the turn as you approach the berm.
Lean into the corner, keeping your outside pedal up and your gaze focused through the turn. Use your body weight to control your trajectory and maintain momentum. The trainer’s controlled environment minimizes the risk of losing control during this complex maneuver.
Practice smooth weight transfers and maintain a relaxed upper body. This technique builds confidence and improves cornering speed and efficiency, essential skills for trail riding.
Developing Flow and Confidence
The manual trainer excels at fostering flow and building rider confidence. Repeated practice in a controlled setting allows riders to overcome the initial fear associated with lifting the front wheel. As skills improve, riders can link manuals with other techniques, creating a smoother, more connected riding experience.
This progressive learning environment encourages experimentation and reduces the risk of crashes. Mastering the manual on the trainer translates directly to increased confidence on the trails, enabling riders to tackle more challenging terrain.
The ability to consistently execute a manual enhances overall bike control and promotes a feeling of mastery, leading to a more enjoyable and rewarding riding experience.

Advanced Manual Trainer Techniques
Refine skills with wheelie-manual combos, tackle uneven surfaces, and troubleshoot common issues for peak performance and control on your mountain bike trainer.
Wheelie-Manual Combinations
Blending wheelies and manuals elevates your bike handling, demanding precise balance and coordination. Begin by mastering controlled wheelies, focusing on a consistent height and smooth pedal strokes. Transitioning into a manual requires subtly shifting your weight backward while maintaining the wheelie position.
The key is timing – initiate the manual as the wheelie begins to subside. Practice finding the sweet spot where you can seamlessly link the two movements. Use the manual trainer to refine this technique, as it provides a stable platform for experimentation.
Focus on maintaining a neutral spine and engaging your core for stability. Small adjustments with your arms and legs will help control the bike’s pitch. Remember, consistency comes with repetition, so dedicate time to drilling this combination.
Manuals on Uneven Terrain
Transitioning manuals to varied surfaces builds adaptability and control, crucial for real-world trails. Start by practicing on slightly bumpy sections, focusing on absorbing impacts with your arms and legs. Maintain a relaxed upper body and allow the bike to move beneath you.
The manual trainer can simulate uneven ground by adjusting its height or adding small obstacles. This allows you to practice maintaining balance while reacting to changes in terrain. Focus on keeping your weight centered and using subtle body movements to correct for imbalances.
Progress to larger bumps and roots, gradually increasing the difficulty. Remember to look ahead and anticipate the terrain, allowing you to prepare for upcoming obstacles. Consistent practice will refine your ability to manual confidently on any surface.
Troubleshooting Common Issues
Struggling with consistent manuals? Often, it’s a balance issue – ensure your weight is centered and avoid leaning too far forward or backward. If you’re looping out, try softening your arms and legs to absorb the momentum. A common mistake is stiffening up; relaxation is key.
If you’re having trouble lifting the front wheel, focus on the initial weight shift and explosive pull on the handlebars. Check that your tire pressure is appropriate; too low can hinder responsiveness.
Always double-check the trainer’s setup before each session – a loose connection or uneven surface can create instability. Prioritize safety and proper form over attempting advanced maneuvers prematurely.
Manual Trainer MTB: Cost and Where to Buy
Prices range from 1500 to 3500 rubles, depending on features and brand. Retailers and specialized bike shops offer various options for purchase.
Price Range Overview
The cost of a manual trainer MTB varies considerably, influenced by build quality, adjustability, and brand reputation. Entry-level, fixed trainers typically start around 1500 rubles, providing a basic platform for learning the fundamental manual technique. Mid-range options, offering adjustable height or roller systems, generally fall within the 2500 ruble price bracket.
These trainers strike a balance between affordability and functionality, catering to intermediate riders seeking more versatile training. Premium manual trainers, often featuring robust construction, advanced adjustment mechanisms, and enhanced durability, can reach up to 3500 rubles or even higher.
However, it’s important to note that individual sellers may offer varying prices, and negotiation is sometimes possible. Considering your skill level, training goals, and budget is crucial when determining the appropriate price range for your manual trainer.
Popular Brands and Retailers
Identifying leading brands in the manual trainer MTB market can be challenging, as it’s a relatively niche product. However, several retailers specialize in bike training equipment and often carry manual trainers. Online marketplaces are excellent resources, offering a wide selection and competitive pricing. Local bike shops may also stock manual trainers or be able to order them for you.
When researching brands, prioritize those known for quality construction and positive customer reviews. Compatibility with various bike types and rider weights should also be considered. Checking for retailers offering warranties or return policies provides added peace of mind.
Remember to compare prices across different retailers before making a purchase, and factor in shipping costs. Exploring online forums and communities dedicated to mountain biking can provide valuable insights and recommendations from experienced riders.
Considerations When Purchasing
Before investing in a manual trainer MTB, carefully assess your skill level and training goals. Beginners might prefer a more stable, fixed trainer, while experienced riders may benefit from an adjustable model offering greater challenge. Consider the trainer’s weight capacity to ensure it suits your build.
Evaluate the build quality and materials; durable construction is crucial for longevity. Portability is another factor – if you plan to transport the trainer frequently, a lightweight and foldable design is ideal. Read customer reviews to gauge real-world performance and identify potential issues.
Don’t overlook the importance of compatibility with your bike’s wheel size and axle type. Finally, establish a budget and compare prices across different brands and retailers to find the best value.
Safety Precautions and Maintenance
Prioritize protective gear, including helmets and pads. Regularly inspect the trainer for wear, ensuring secure wheel placement before each ride for safe operation.
Essential Protective Gear
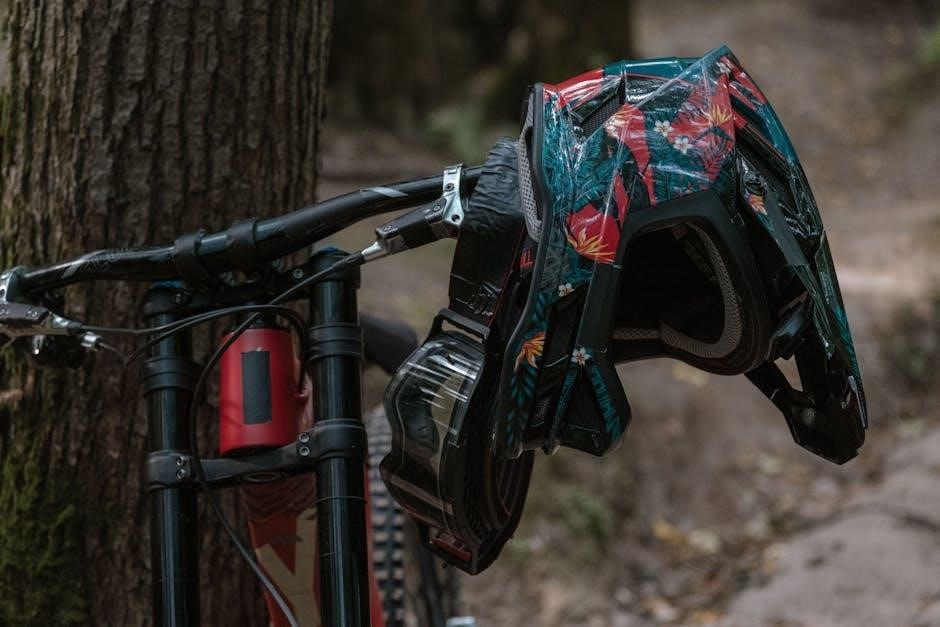
Safety is paramount when utilizing a manual trainer. A properly fitted helmet is non-negotiable, protecting against head injuries from potential falls. Knee and elbow pads are highly recommended, cushioning impacts and minimizing abrasions. Gloves provide a secure grip and protect hands during bails or unexpected dismounts.
Consider shin guards, especially during initial learning phases, to shield against frame contact. Eye protection, such as goggles or clear glasses, safeguards against dust and debris. Footwear should offer good grip and ankle support. Always inspect gear for damage before each session, replacing worn or compromised items immediately. Prioritizing protective gear significantly reduces the risk of injury and allows for confident progression.
Regular Inspection and Maintenance
Consistent upkeep ensures your manual trainer’s longevity and safe operation. Before each use, meticulously check all bolts and fasteners, tightening any that are loose. Inspect the frame for cracks or bends, immediately addressing any structural concerns. Examine the wheels or rollers for damage, ensuring smooth rotation without wobble.
Regularly clean the trainer to remove dirt and debris, preventing premature wear. Lubricate moving parts as needed, maintaining optimal functionality. Always verify the front wheel is securely positioned before riding. Periodically assess the stability of the trainer on its surface. Proactive maintenance prevents accidents and extends the trainer’s lifespan, maximizing your investment.
Proper Storage Techniques
Correct storage safeguards your manual trainer from damage and extends its usability. When not in use, store the trainer in a dry, sheltered location, protecting it from the elements – rain, sun, and extreme temperatures. Avoid storing it outdoors or in damp environments, which can cause rust and corrosion.
If possible, disassemble the trainer for more compact storage. Cover it with a dust sheet or tarp to prevent dirt accumulation. Ensure the storage area is free from obstructions to avoid accidental damage. Regularly check the stored trainer for any signs of deterioration. Proper storage preserves the trainer’s condition, ensuring it’s ready for your next training session.